TUTORIALS
A GUIDE TO USING THE BLACK & WHITE PLUGIN FOR PHOTOSHOP
video tutorials
Click below to watch the available video tutorials that show you how to use and get the best from the Pulsar Black & White Plugin for Photoshop.
Scroll down for plugin installation instructions and general tips.
Video: Plugin Introduction
Video: Working with Saved Selections
Video: Image Editing Walkthrough #1
GENERAL TIPS
Most of the effects that the Black & White plugin provides are best used in conjunction with layer masks (including luminosity masks). Further tutorials on how to use these to create stunning black and white images will be provided elsewhere, whereas the following overview is a simple guide on what each effect/button/dial etc does and how they work.
HOW TO INSTALL
After downloading the Zip file containing the plugin installation file, extract the contents of the Zip file to a folder on your computer and then double-click the file named:
com.pulsarplugins.blackandwhite_PS.ccx
This will open the Creative Cloud installer where you’ll be shown a handful of prompts for you to confirm:

OPEN PLUGIN IN PHOTOSHOP
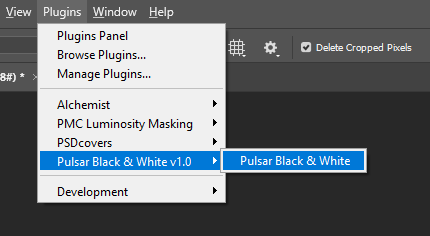
After seeing the green message above to confirm installation is complete, open the plugin in Photoshop via the following menu option:
DOCK PLUGIN
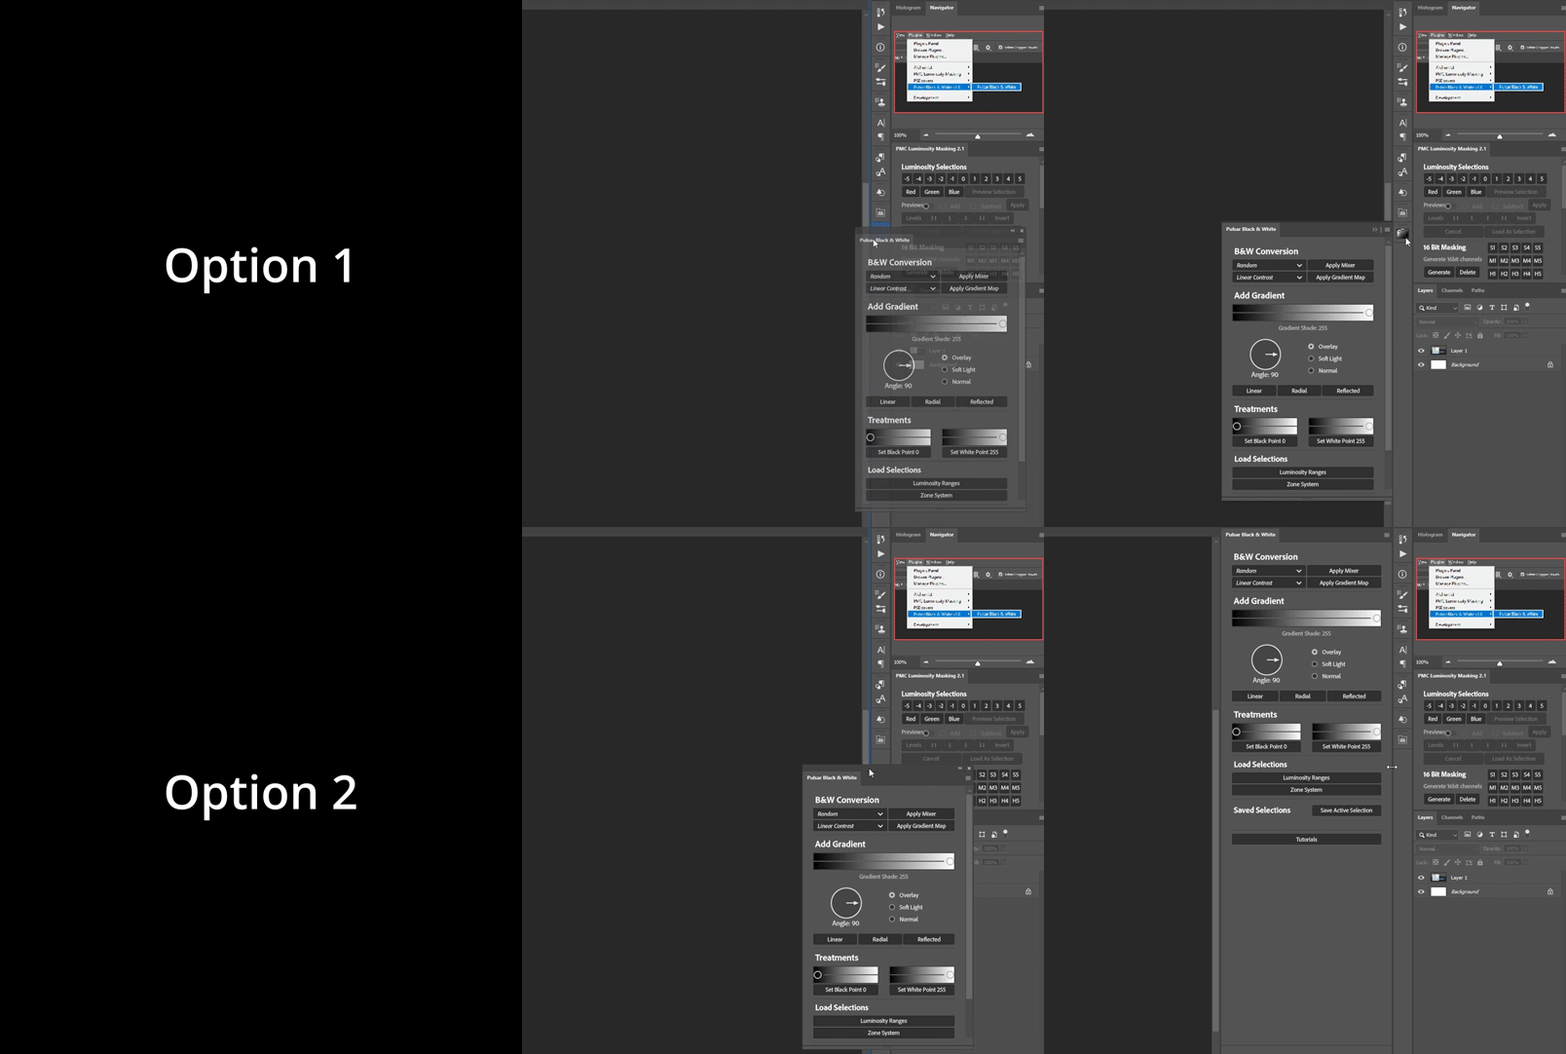
For your convenience, drag the plugin into a sidebar using one or two of the positioning methods shown below, depending on whether you want it to pop out or be constantly available.
Click here to view example
B&W CONVersion
The Black & White plugin offers two methods of conversion, each with a handful of presets to choose from.

The first option is a Channel Mixer adjustment layer which is set in the dropdown menu to “Random” by default.
With this selected, press the “Apply Mixer” button as many times as you like until you settle on a version of the B&W conversion you like.
Alternatively, use the dropdown to select one of the presets.
Option number 2 is to use a Gradient Map for your conversion. There is no random option for this, so choose one of the presets and click “Apply Gradient Map”.
NOTE: for each of the non-random presets, pressing the button multiple times will result in multiple adjustments being added, so when trying multiple presets to see which one looks best for your image, you’ll want to delete the previous one before selecting the next.
USING GRADIENTS
Gradients are a big part of the particular Black & White style the plugin is designed to help you achieve, and the “Add Gradient” section gives you a convenient and intuitive way to apply them to your images.
To add a gradient follow these steps:
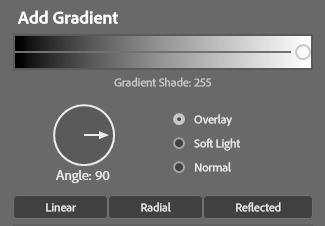
Step 1: select a shade for your gradient.
Select any point along the slider to choose a shade for your gradient. For example, if you want a white-to-transparent gradient, slide it all the way to the right (as per image below). If you want a black-to-transparent gradient, slide it to the left. Or if you want somewhere in between, slide it to somewhere in between.
Step 2: Select the angle.
Using the dial, point the arrow in the direction you want the gradient to fade out to transparent towards.
For example, set at 90 degrees as in the image, the gradient would start out white on the left side of the image and fade to transparent on the right.
Step 3: Select the blend mode
Choose which blend mode to add the gradient with. Overlay and Soft Light will apply the gradient in a way that either brightens or darkens the image, and Normal will simply apply the gradient as a coloured overlay.
Step 4: Choose the gradient type
A linear gradient is the “typical” gradient that fades from a colour/shade to transparent in a single direction.
A radial gradient is essentially a “ball” that fades out towards the edges.
A reflected gradient will produce a “beam” of light/shadow in a straight line
TREATMENTS
This section of the plugin gives you an interface from which to add an adjustment layer that sets the black point and/or the white point in your image to a specific tonal value.
For example, if you want the darkest pixel in your image (or selection) to be set to a value of 20, slide the slider to 20 and click the Set Black Point button.

Important: Doing this will then set the black point to 20 in a curves adjustment layer. It’s important to note that this is NOT just setting the black point of the curve to 20.
The Black & White plugin analyses the light values present in your image or selection and then calculates the exact curves adjustment needed to make the darkest pixel be a value of 20.
LUMINOSITY SELECTIONS
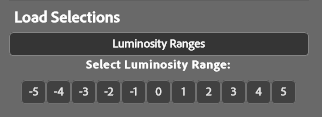
Press the “Luminosity Ranges” button to reveal the luminosity selection bar.
Button -1 will load a selection containing all pixels to the left of middle of your images histogram – i.e. the dark half.
Buttons -2 through -5 load selections with increasing levels of shadow isolation with -5 being only the very darkest shadows.
Buttons 1 through 5 load highlight selections with 1 being “the light half” and 5 being only the brightest highlights.
And 0 will load a midtones selection.
ZONE SYSTEM SELECTIONS
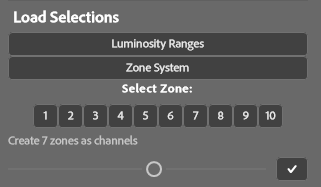
Press the Zone System button to reveal the “Select Zone” options.
Zones differ from Luminosity Selections in that they divide the histogram into equal “slices” which you can then load as a selection.
When you want to select the darkest darks, press 1. The brightest highlights, press 10.
You can immediately load a zone as a selection by pressing one of the buttons labelled 1-10.
Alternatively, if you want to divide the histogram into a different number of zones you can use the slider to select that number, then press the checkmark to save that number of zones as channels which will then appear in the “Saved Selections” section of the plugin.
SAVING & LOADING SAVED SELECTIONS
When you first load a new image into Photoshop, this section will be empty.
If you open an image in which you’ve previously saved any channels in the Channels panel in PS, then those channels will be listed in this section of the plugin upon opening.

For now lets assume we’re starting with a new image.
The way this section of the plugin is intended to be used is for quick, easy, and convenient access to many of the channel-related functions that are normally very complicated and tedious.
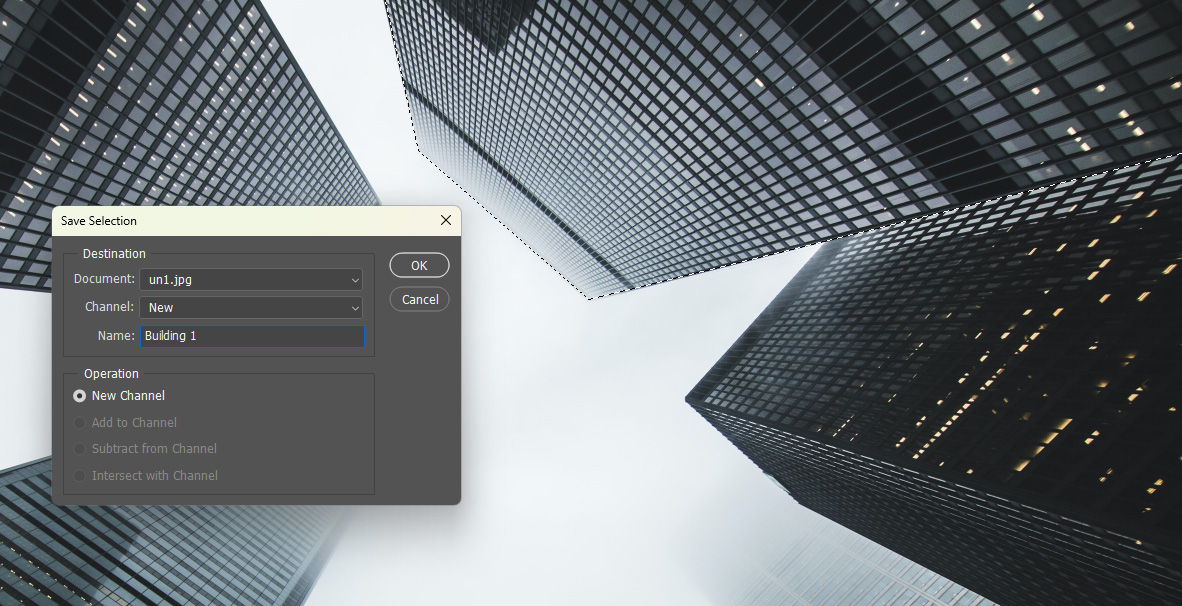
You can save any selection you make, by clicking the “Save Active Selection” button.
Give the selection a useful name in the prompt, and then see it appear in the list of saved selections. In this example, I have made a selection around the building (as seen by the marching ants), clicked the “Save Active Selection” button, then given it the name “Building 1”.
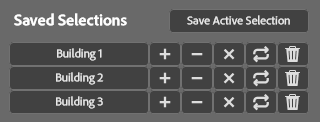
Having done the above, we can see there’s a new row in the list of Saved Selections in the Black & White plugin:

Now if we ever want to load that selection again quickly later on in our workflow, we can click the large button labelled Building 1.
To delete the saved selection, we can hit the trash can button.
REPLACE LAYER MASK WITH SAVED SELECTION
Pressing this button will load the selection into the layer mask of whichever layer you have selected in your layers panel. If the layer already had a mask, it will be replaced.
If no layer is selected in the layers panel, it will apply to the top layer in your layer stack.
If the selected layer (or top layer) doesn’t have a layer mask, an error message will appear to let you know the command isn’t available.
USE CASE 1:
Replacing a mask with a saved selection is very useful when you have made an adjustment or created a layer which affects the whole image, and you decide later to restrict it to a particular part of the image that you’ve saved a selection for.
USE CASE 2:
It’s incredibly useful at times when you’ve saved a particular selection, then applied that selection to one or many layer masks, but then later realise there is a mistake or innacuracy in your original selection.
Rather than have to go back and re-edit every single layer mask that contains the mistake, you can create and save a better selection, then use that to replace all those layer masks in just a few clicks.
ADD / SUBTRACT / INTERSECT SAVED SELECTIONS
When you have two or more saved selections, you can use the above buttons to add or subtract them from one another, or intersect them with one another.
ADDING SELECTIONS:
Lets say I’ve made selections for three separate buildings (as above).
Then I want to make a selection of Building 1 and Building 2.
Instead of drawing that selection manually again with the selection or pen tool in PS, I can press “Building 1” to load Building 1 as a selection.
Then I can press the + button for Building 2 and Building 2 will be added to the active selection in Photoshop.
I could then Save that active selection as “Buildings 1 & 2” for quick easy access later.
SUBTRACTING SELECTIONS:
In the following example, I have made one selection for the full building, and one for the bottom half – I have highlighted the bottom half in red.
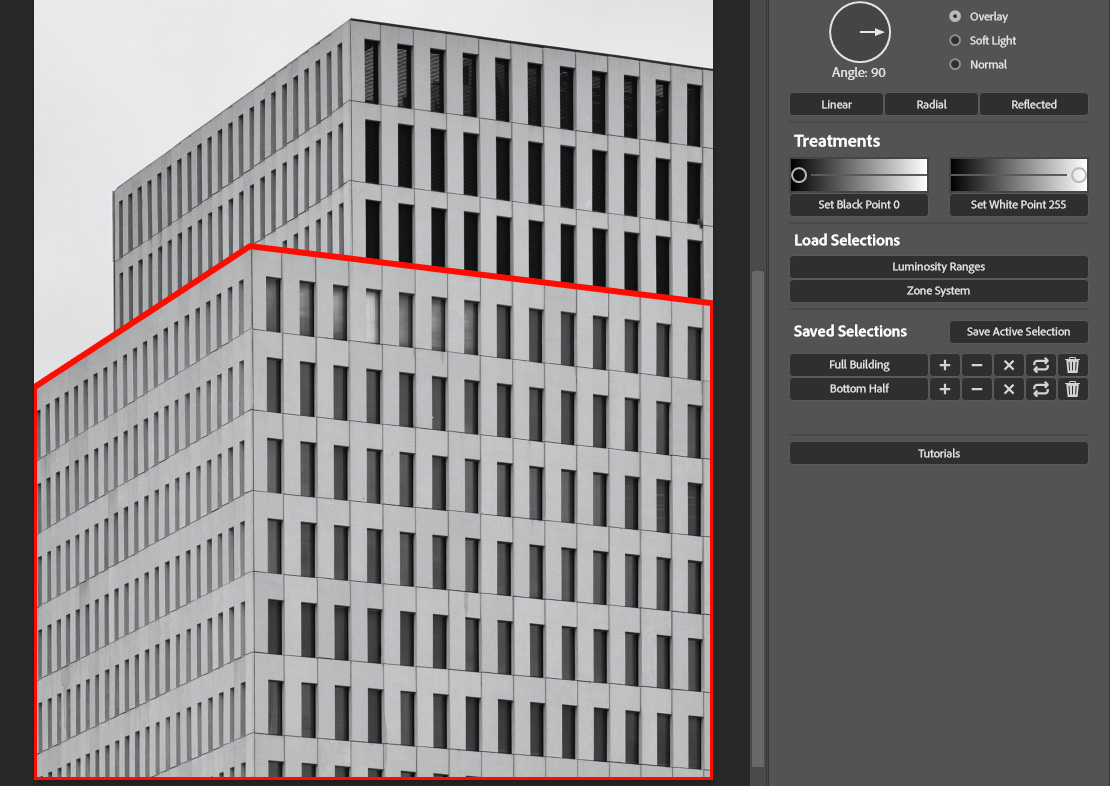
Now if I want to create a selection for the top half of the building without drawing around those edges again (which can and will lead to minor discrepancies if you’re trying to select the same edge twice), I can do it in two clicks:
1: Click the “Full Building” button to load it as an active selection
2: Click – on the “Bottom Half” saved selection to subtract it from the active selection. This will leave only the top half of the building selected.
3: Optional: Save the Top Half as a new saved selection
INTERSECTING SELECTIONS:
This is a technique more commonly used when dealing with luminosity selections and the depth of that topic is beyond the scope of this simple overview.
But here’s a quick explanation of the basic concept and what the intersect (X) button allows you to do.
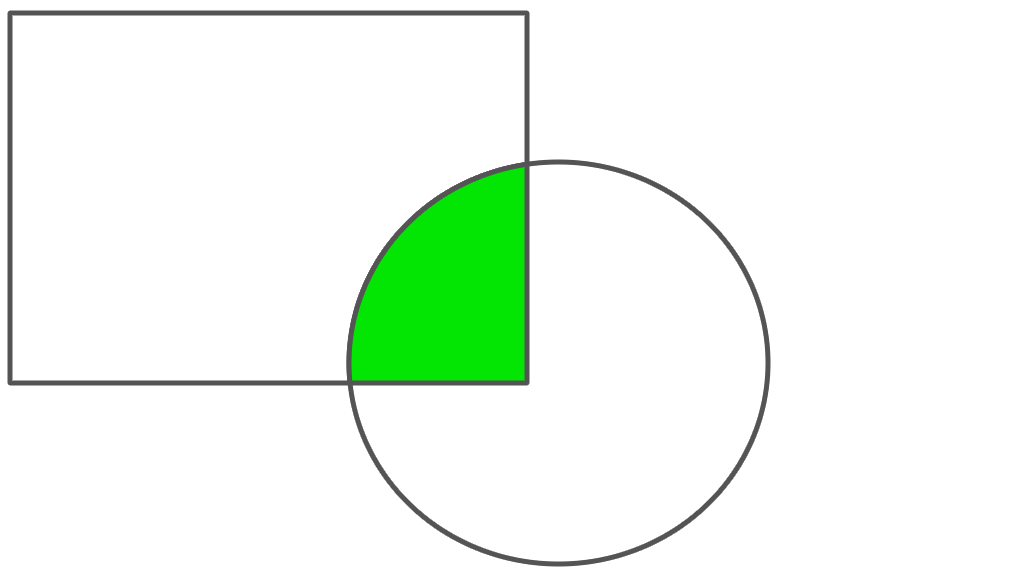
At its most simplest, when you have two separate selections that happen to overlap each other, you can make a selection that includes only that overlapping section by intersecting them.
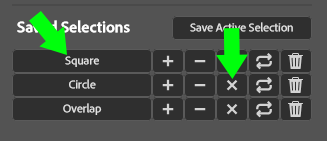
Let’s say we have two selections named “Square” and “Circle”.
Then we click the “Square” button to load it as an active selection.
Then we click the X button for the Circle to intersect it with the active selection.
What we have left is the overlapping portion (shown in green below), which we could then save as a new selection if we want.
